Pear is one of the most important fruit species in the central and southern regions. There are winter-hardy varieties for amateur gardening in central Russia, the North-West region, the Urals, Siberia and the Far East. In order for the pear to give good harvests of delicious fruits, it is very important to properly care for it throughout the season.
Where and how does a pear grow in the garden and in the wild
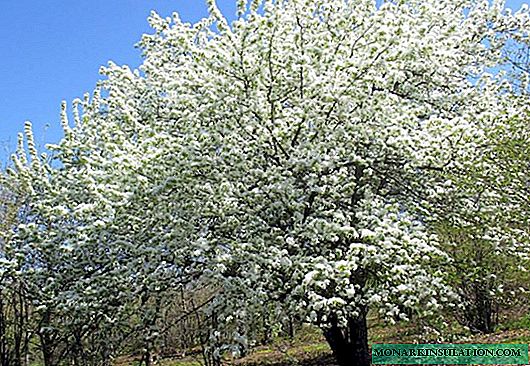
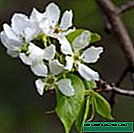
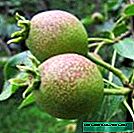
Pear - a strong-growing deciduous tree up to 8-15 m high, with a powerful rod root system that goes deep into the soil. It blooms in spring, in April-May. The fruits ripen from July to October, depending on the variety and region.
Southern pear varieties originate from wild forest pear, and more winter-hardy northern varieties come from the crossing of forest pear and southern varieties with wild Ussuri pear.
All wild pears (forest, Ussuri, paganifolia, loosestrife) in the zone of their natural growth and climate-similar regions can be used as stocks for cultivars.
Table: features of different types of wild pears
| Name / Properties | Drought tolerance | Where it is found in nature | Regions of natural growth | Winter hardiness | Regions of use as stock |
| Ussuri pear | Low | Wet mixed forests along the fringes and river banks | Far East of Russia | Very high (-40 ... -45 ° C) | Far East, Siberia |
| Forest pear | Average | Forest edges and clearings | Central and southern regions of Russia, Ukraine | Medium (-25 ... -35 ° C) | All Ukraine, the center and the south of Russia |
| Pear | Very high | Woodlands, dry rocky slopes | Crimea, Caucasus | Hardy only in the southern regions | Southern arid regions of Ukraine, Crimea, Caucasus |
| Pear loosestrife | Caucasus |
Photo Gallery: Wild Pear Species
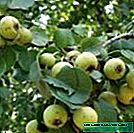
- Ussuri pear grows in mixed forests

- The fruits of the Ussuri pear can be tasted in the Far East


- Pear forest grows on forest edges and clearings

- Forest pear fruits are popular in Ukraine, in the central and southern parts of Russia


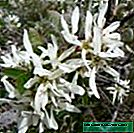
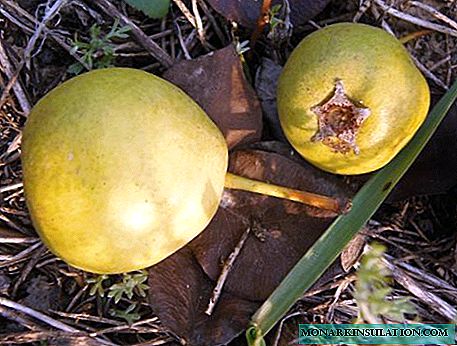
- Pear foliar can grow on rocky slopes.

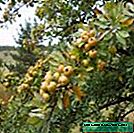
- Pear fruit can be found in arid regions.


- Looser pear also prefers dry slopes and light forests


- The fruits of the loosening pear can be tasted in Ukraine, the Crimea and the Caucasus

Fruiting dates of cultivated and wild pears
Dates of pear fruiting start:
- wild pears and seedlings of cultivated varieties - 9-15 years after planting;
- grafted on seed stock - after 5-10 years;
- grafted onto a dwarf stock - after 2-4 years.
On a seed stock, a pear grows and bears fruit for 50-100 years, on a dwarf one - no more than 20-40 years.
In my garden, a huge wild pear of almost six meters height, planted by my grandfather in the 1970s and successfully survived the extreme winter of 1978 with forty-degree frosts, still grows and abundantly bears fruit annually. In the early 90s, the grandfather planted several cultivars on seedlings from its seeds. At first, vaccinations developed poorly due to terrible thickening in that corner of the garden. When I eliminated the extra thickets in the early 2000s, leaving only pears there, the trees immediately showed a powerful growth and bloomed in 1-2 years.
Features of pear vaccination depending on the region
A dwarf pear is a tree of a common cultivar grafted onto a special stock - a vegetatively propagated quince form. It grows no higher than 3-4 m.
Quince pear can grow only in the southern regions with warm winters. It blooms there in the 2-3rd year after planting. In central Russia, quince freezes.

Quince pear blooms in the 2-3rd year after planting
Novice gardeners often confuse real quince with more frost-resistant Japanese quince (henomeles), but henomeles is not suitable for vaccinating a pear.
Due to the lack of zoned winter-hardy dwarf rootstocks, gardeners of the Moscow Region, the Leningrad Region, the Urals and Siberia often experiment by planting a pear on ordinary red mountain ash, cirrus and chokeberry (aronia). For experienced specialists, such vaccinations often turn out to be successful, although not too durable. On the irga and chokeberry, the pear grows low due to poor compatibility with the stock, but such vaccinations must be regularly updated due to the rapid death of the grafted branches.
Photo Gallery: Possible Rootstocks for a Pear
- Quince can serve as a stock for pears only in the southern regions


- Japanese quince (henomeles) is not suitable for vaccinating pears


- Specialists plant a pear on a mountain ash

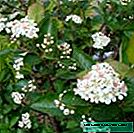
- Aronia can also be used as a stock for pears.

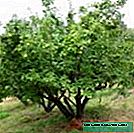
- Irga is also considered an unreliable stock for pears, but is used in cold regions.

Pear propagation
Pear propagates by seed and vegetatively. During seed propagation, varietal characters are not preserved, therefore, it is used only for growing stocks and for breeding purposes to create new varieties.
Pear seed propagation
The procedure for propagating a pear seed way:
- To collect fully ripened fallen pears under the trees (in September-October).
- Remove seeds from them, taking the largest, undamaged, well ripened (dark brown or black).
- In the second half of October, sow seeds on a prepared bed to a depth of 2-3 cm.
- Thin the seedlings in the spring, leaving at least 15 cm between the seedlings.
Wild pear seeds are good for growing stocks

Pear propagation by cuttings
The lignified cuttings of pears do not root at all, and green ones with great difficulty and only when using special root stimulants. Rooted cuttings can be wintered in open ground only in the subtropical zone, in other regions they are rooted in crates and cleaned in a ventilated cellar for the winter.
Pear propagation by green cuttings
Procedure for propagating pears with green cuttings:
- Prepare boxes 35 cm deep. Place a 20-cm layer of loose garden soil in them, then 10 cm peat in half with sand and 2 cm of clean river sand on top.
- Cut young shoots of the current year, when they begin to slightly lignify in their lower part.

For grafting use shoots of the current year
- Cut the cuttings from the lower and middle parts of these shoots. Green grassy tops do not root.
Cuttings are cut from the lower and middle parts of the shoots
- Treat the lower sections of the cuttings with a root stimulant according to the instructions for the drug.
- Slightly lower the bottom of the cuttings into the upper layer of sand in the box. Layout - 7 cm between rows, 5 cm between cuttings in a row.

Pear cuttings root in crates
- Cover the cutlery with polyethylene, without touching the cuttings, put in a bright place without direct sunlight and spray regularly.
- When the cuttings take root, the cuttings begin to air, and then the film is completely removed.


After rooting, cuttings are gradually accustomed to open air.
Pear propagation by air layering
Aerial layering is a method of rooting branches directly on a tree. The main problem is overwintering: the roots formed during the summer in most cases die during winter frosts.
Procedure:
- Last year’s young branch chosen for rooting is slightly scratched with a knife in the place of the planned rooting.
- Tie a black plastic bag below the scratches.
- Fill it with peat or coconut substrate, pour it with water and tie it tightly above the scratches on the branch.
- After a few months, when the roots are formed, cut off the rooted branch and transplant into the nursery for growing.
After the appearance of the roots, the plot with them is cut from the tree

Pear Inoculation
The most reliable method of obtaining pear seedlings is vaccination. There are two main ways of it:
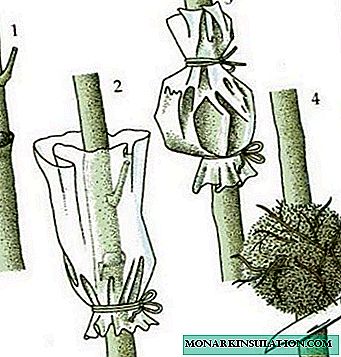
- summer budding - vaccination of a bud (eye) of the scion in the T-shaped incision of the rootstock bark;
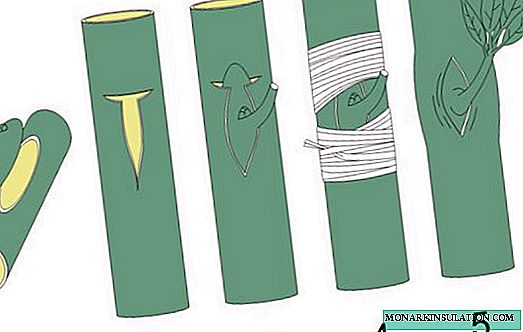
The stool is an inoculation with an eye (kidney)
- spring copulation - grafting graft graft on a trimmed stock.
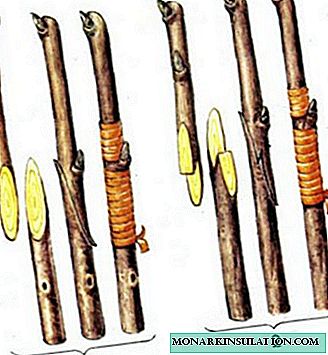
Copulation is called graft grafting


All vaccinations are fixed by wrapping with elastic tape. The next year, the harness is weakened.
Bookmark Pear Orchard
For planting a pear orchard, places well-lit by the sun on gentle slopes are chosen. For northern gardening (Leningrad Oblast, Moscow Region, the Urals, Siberia), only slopes of the south, southeast, and southwest are suitable. In the south - any, except for the steep northern ones.
Southern pears need soil acidity in the range of 6.0-7.5. Northern varieties, grafted onto the Ussuri pear or created with its participation, prefer acidity in the range of 5.5-6.5.
Groundwater problem
For a pear on a vigorous seed stock, groundwater should be no closer than 1.5-2 m from the soil surface, for a dwarf pear on a quince, 1 m is enough.
Planting seedlings on mounds, widely promoted in the 80-90s, did not pay off in the long run, such trees are very short-lived. The roots nevertheless grew to underground water, which caused the tree to die, or it would freeze in a snowy frosty winter.
Most of the recommendations on wastewater management found in the specialized literature are focused on large-scale industrial gardening enterprises. The possibilities of a separate amateur gardener and even a separate horticultural cooperative are very limited in this regard. Here are some common examples:
- The site is directly on the shore of a large reservoir (river or lake), partially flooded with water in spring. This is incorrigible. In the flooded part, trees can never grow.
Flooded area on the shore of the reservoir - the problem is unrecoverable
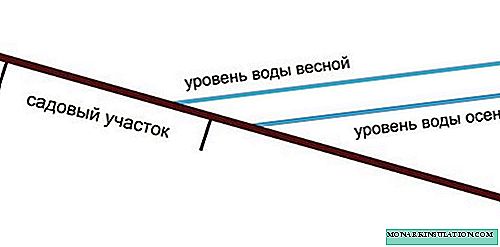
- The plot is in the lowering of the relief (ravine, a deep valley between the hills), in the spring there is water on the plot. If this is a narrow and deep ravine, it is useless to do something: in such places it is too dark, and in winter the trees will inevitably freeze due to stagnation of cold air. If it is a wide valley with a noticeable slope to the south, southeast or southwest, then the conditions for trees are more favorable. In this case, in its deepest part, it is necessary to dig a longitudinal ditch for the spring water runoff and to strengthen its bottom and walls well.

Land in the valley can be drained by digging a ditch to drain water
- A plot in a suburban village, along the edge of which there is already a ready-made public drainage ditch, but the land there is still damp. If the spring water level in the ditch is noticeably lower than the surface of the soil, the situation can be relatively easily remedied by a drainage system. If the water in the common ditch is flush with the surface of the site - this is incorrigible.

The laying of drainage pipes on the site is effective in the presence of a public drainage ditch


Drainage system
Procedure for arranging a drainage system:
- In the direction of the drainage ditch in the area, you need to dig a few trenches with a depth of 1-2 m with a slight slope towards the ditch. The bottom of the trenches in their lowest part should be higher than the maximum water level in the ditch. The distance between the trenches is from 3 to 10 m.
- A layer of crushed stone or coarse gravel is poured into the trenches and special ceramic or concrete drainage pipes with numerous holes are laid. At the joints, their edges are adjusted and covered with pieces of tile from above.

Drainage pipes are laid in ditches along a layer of rubble and gravel.
- From above the pipes are covered with a layer of gravel and then with earth.

From above, drainage ditches with laid pipes are first covered with gravel, then with earth


Planting seedlings
In the North-West, central and northern regions of the middle zone, in the Urals and Siberia, a pear is planted only in spring, from late April to late May. In the south, this is usually done in the fall, in October. In the Black Earth region spring or autumn planting is possible.
The distance between the tall trees of the pear should be from 5-6 m in the north and up to 7-8 m in the south. Dwarf varieties on quince rootstock are planted according to a 3x2 m scheme with the obligatory installation of supports.

Dwarf trees require support
The depth of the planting pits for dwarf seedlings is 50-60 cm, for tall plants - up to 1 m. The diameter of the planting pits is 80-100 cm.

The depth of the pit for dwarf seedlings should be 50-60 cm
The procedure for landing:
- Drive a landing stake in the center of the pit.
- At the bottom pour a mound of earth mixed with a bucket of humus.
- Place the seedling on the knoll, spreading the roots.
- Bind the seedling to the stake so that the root neck is fixed at the level of the soil surface.
- Gently fill the pit with earth.
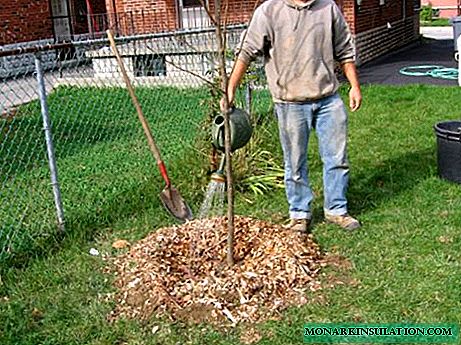
It is better to water when planting in 2 doses: 1 bucket of water in the pit before planting and another bucket of water from a watering can with a divider immediately after planting to compact the earth around the roots.

When planting a seedling must be watered
Video: Pear planting
How to care for a pear
The care of the pear garden during the season is approximately the same in all regions of its cultivation.
Pear shaping and pruning
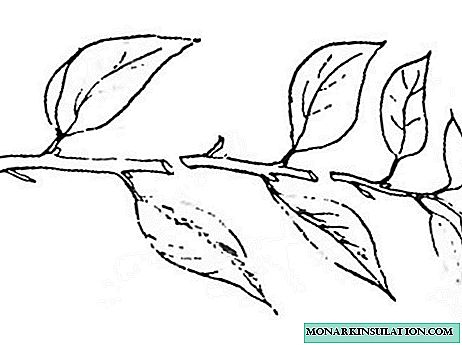
Without formation, the pear grows very high, many branches depart from the trunk at an acute angle and can subsequently break off under the weight of a plentiful crop.

A pear without formation grows very high, and many branches depart from the trunk at a dangerous acute angle
To avoid the risk of breaking branches, young trees are formed by bending their branches to an almost horizontal position and securing them with braces. Such branches begin to bear fruit earlier.
With timely bending of the branches of young trees, additional forming pruning is usually not required. Sanitary pruning, consisting in the removal of dried and broken branches, is necessary for pears of any age. Spend it from spring to the end of summer, and in the south - and in the fall. All large sections after trimming should be treated with garden var.
Video: how to trim a pear
Feeding pears
Trees are fed in the spring, evenly distributing fertilizers over the entire area of the trunks and planting in the soil when digging. Estimated fertilizer rate per 1 m2:
- 12-18 kg of humus;
- 20-50 g of ammonium nitrate;
- 40-80 g of superphosphate;
- 20-40 g of potassium sulfate.
How to water a pear
Pear is watered only in drought, deeply soaking the soil to a depth of at least 1 m:
- It is enough to water very young trees of the first or second year after planting from a watering can or hose with a divider at the rate of 2-3 buckets of water per plant about 1 time per week.
Very young trees can be watered from a watering can or hose
- Fruit-bearing adult gardens on a dwarf rootstock are watered 2-3 times a month, on silospeed - not more often than 1-2 times a month. Approximate watering rate - about 3 buckets of water per 1 m2 for dwarf gardens and up to 5-6 buckets of water per 1 m2 - for vigorous.

Quince pear is quick-growing and fruitful, but needs regular watering
- Traditionally, for irrigation of adult gardens, water from the irrigation system is directed along the grooves into the holes around the tree trunks.

Watering adult trees is carried out in the holes and grooves
- It is more correct to arrange not holes, but watering rings with such a calculation so as to prevent the base of the trunks from getting wet. The width of the rings or holes should correspond to the size of the root system, occupying an area approximately equal to the area of the crown of the tree.
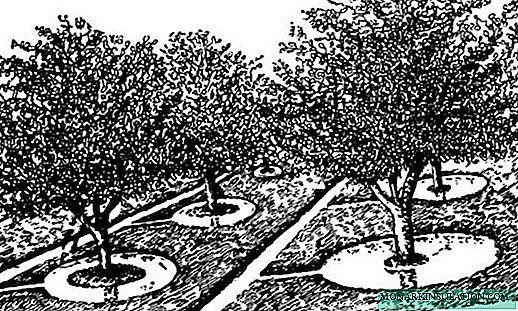
Trees grow better if water does not get to the base of the trunk during irrigation


In gardens of any age, drip irrigation and mulching the soil with organic materials is very effective to preserve moisture and prevent weed growth.

Drop watering and mulching are effective in gardens of any age
Pear Diseases and Pests
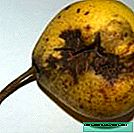
The most common pear diseases in all areas of horticulture are scab and fruit rot, and of the pests - the moth. Against diseases, trees are sprayed with copper-containing fungicides at the beginning of budding and after flowering.Against the moth, they are sprayed with pyrethroid insecticides at the same time.
To maintain the health of the garden, it is very important to collect and destroy the affected fruits (rotten or wormy) in a timely manner.
Photo gallery: pear diseases and pests
- Scab often threatens pears


- Copper-containing fungicides will help against fruit rot

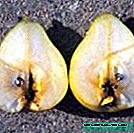
- Moth caterpillars pose a danger to pear fruit

Winter preparations
Pear trees of winter-hardy zoned varieties do not need any shelters that interfere with normal hardening and create a constant threat of bark heating during thaws. To protect against hares, young trees need to be fenced with a special protective net in the fall.
The expediency of whitewashing is very doubtful, but if you still want to whitewash the trees, do it right:
- in the autumn before wintering, and not in the spring on holidays;
- only young trees with relatively tender and thin bark;
- to whiten not only the trunk, but also all the bases of large skeletal branches.
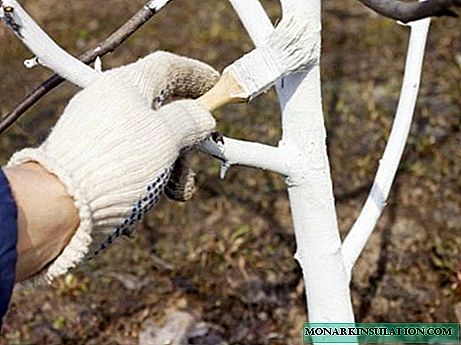
If the tree is whitened, then you need to capture both the trunk and the base of the skeletal branches

How to grow a pear in a bottle
Growing an exotic curiosity - a pear in a bottle - is not difficult at all:
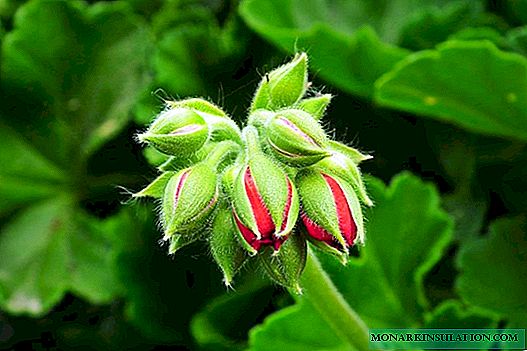
- After flowering the pear, you need to select several conveniently located ovaries.
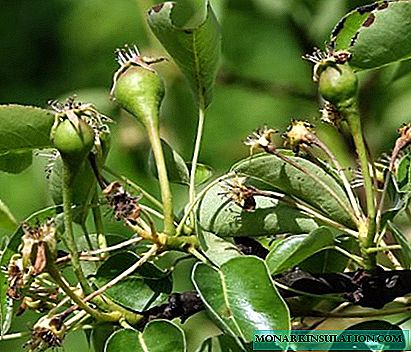
To grow a pear in a bottle, you need its ovary
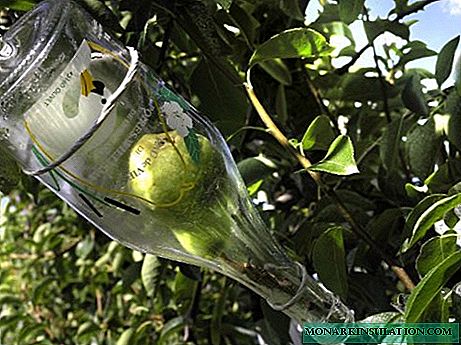
- Carefully put each selected ovary along with the branch on which it grows into the bottle.

Carefully put the young ovary of the pear along with the branch into the bottle
- Carefully fasten bottles with ovaries inside, tying them to thick branches or supporting posts.
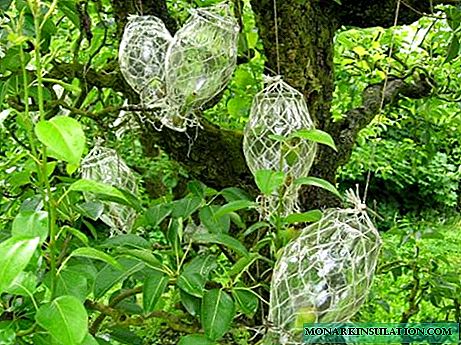
Bottles with ovaries securely fastened, tied to large branches
- Pears will grow inside the bottles. When the fruits on the tree ripen, the branches must be carefully pruned.
After ripening the fruit in bottles, the branches need to be cut
- For long-term storage, pear bottles are poured with strong alcohol.
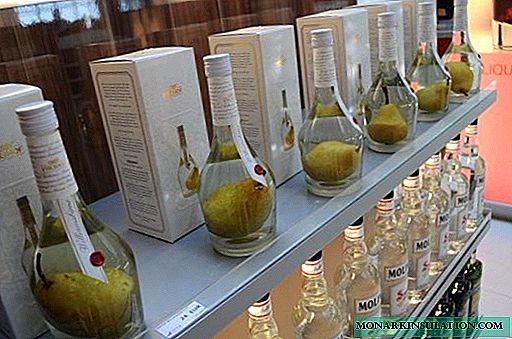
For storage of pears in bottles pour strong alcohol


Harvesting and storing pears
Different varieties of pears have their own ripening, collection and storage dates:
- summer varieties ripen in July-August, stored no more than 2 weeks;
- Autumn varieties ripen in late August - early September, stored for 1-2 months;
- winter varieties ripen at the end of September - in October, stored 3-5 months.
Winter varieties of pears have time to ripen only in the southern regions.
Summer varieties are harvested fully ripe and used immediately. Autumn and winter varieties are harvested even harder when the seeds in them become dark brown. Before eating, they must ripen in storage from 2 weeks to 2 months, depending on the variety. All pears are stored in the refrigerator or in a well-ventilated cellar with a temperature slightly above zero degrees.

Pear must be collected carefully without damaging the fruits and branches
When harvesting, it is important to pick the fruit correctly. To do this, hold the branch on which the fruit grows with one hand, and carefully take the pear with the other and turn it around the stem to separate it from the branch. For storage, fruits are harvested only by hand. All kinds of fruit pickers damage pears and fruit branches, and a crop that has fallen to the ground is deformed by impact and is not suitable for storage.
Reviews on pear breeding methods
None of the green cuttings of the pear contained in the water before planting were rooted. Shanks treated in the traditional way - IMC, adopted as a prototype, began to take root on the 42nd day after planting, the rooting rate for them was 23. Processing of cuttings with Tropolon at a concentration of 6 mg / l slightly accelerated the appearance of roots, but the rooting rate was 10% lower than when processing IMC.
Denys
//forum.vinograd.info/showthread.php?t=11091&page=11
If rooting, then take a plastic bag (black), put on a pear, on a vertically growing annual shoot (preferably from the south side), put in it your favorite coconut with vermiculite, water and tie it from below and from hereafter and from above. And by the fall you will be happy. Bottom in the bag can damage the bark for better rooting.
vp
//forum.prihoz.ru/viewtopic.php?f=30&t=5534&sid=c5adb8f338bbf9b2a6bf4c91b4dc5ff6&start=75
With proper planting and proper care, pear trees grow well and bear fruit for many years, delighting their owners with annual plentiful harvests of tasty and healthy fruits.